


So I’ve had a kitchenaid forever. I have worked two to death, canning applesauce, grinding flour, grinding venison and making sausage, kneading artisan bread, shredding kraut and making tomato sauce. I called kitchenaid and they shipped me a new one in a day’s time — sometimes an upgrade. But this last one was long past warranty when it coughed and started skipping, ker-chunk-chunk, oozing oil in a sinister fashion.
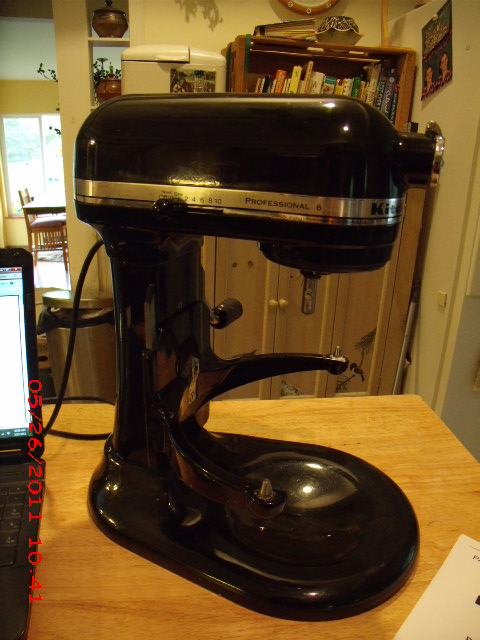
So I decided to take it apart. If I could see what was wrong, I could maybe fix it. If not, it would at least be fodder for fobot projects. Picture one is the Iron Horse itself, awaiting surgery.
I poked around the internet and printed an exploded diagram and parts list. I needed a phillips head screwdriver, so of course I found five flatheads. The second picture is step one: remove the aluminum band. Note: eew. There was old food and oozed oil under there.
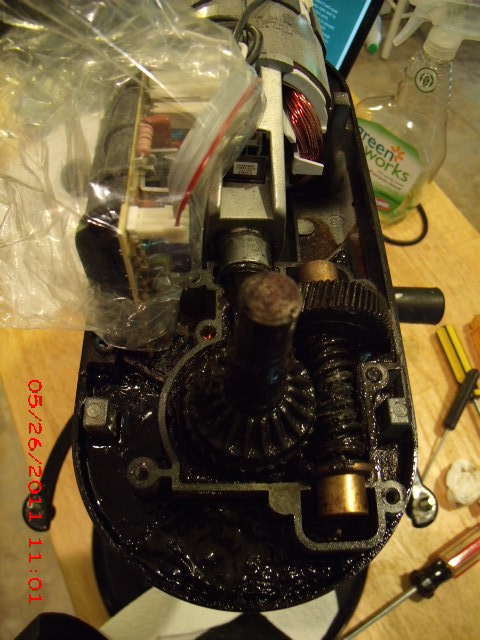
Step two was to unscrew the whole top of the machine. Picture 3 shows what that looked like. Auxiliarry dad Mel Jacobsen taught me to always take pictures when rewiring kilns, in case I need to remember where stuff went to put it back together.
Step three was to take the top off the gear housing in the front there. I put a plastic baggie over the circuit board first to protect it from grease. There was a LOT of grease. I have spared you a picture of my black crusted fingernails. I removed grease with a screwdriver blade and then with q tips. Eeesh.
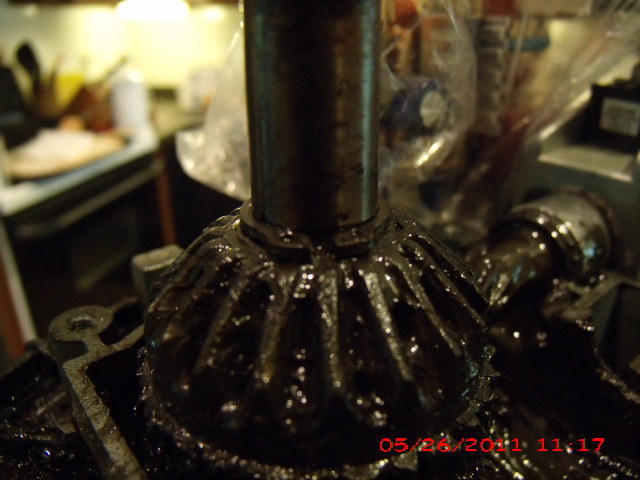
See the horizontal worm gear on the right? The one with the coppery looking end? That lifts right out. The dome shaped one to its left, though, is held in place by a little clamp ring. Not sure what it’s called but I made up several unkind names for it as I tap-tap-tapped it upward one skillimeter at a time.
You can see the ring in place in the 5th pic.
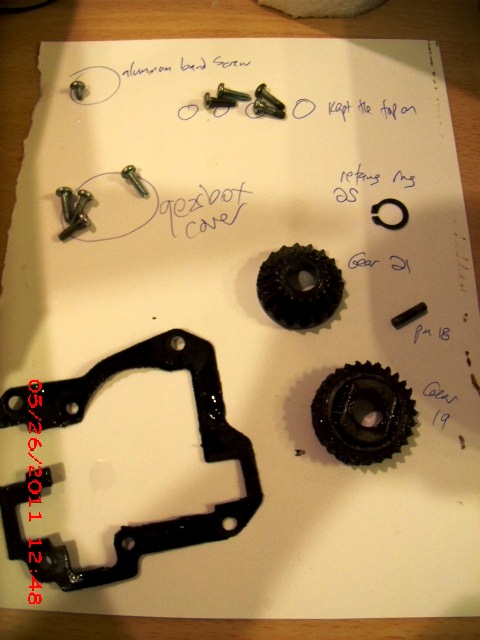
When you remove all those upright gears, you can make the whole bottom piece drop out (it’s called the planetary, which I consider kind of cool.) As I removed parts, I put them on a sheet of paper and wrote next to them where they came from. That’s picture six. I have a short attention span and have become really good at adapting to my non-linear way of thinking.
After I got all the parts out and cleaned them up, finding no toothless gears or shattered bits, I wiped more grease and looked carefully at that horizontal worm gear. The long shaft looked like a rotini noodle, but the center part of the swirl had been worn thin and narrow and quite sharp — cleary worn enough to cause the double-skip!
I called around until I found a place called Mr. Appliance in South Toledo. I picked up the boys after final exams and then headed down there, with my parts list, model number and the greasy worm gear in a bag. I decided to spring for a new gasket for the gear box as well, as the existing one had obviously allowed grease to ooze out around the edges. And for ten bucks I got a styro cup full of the special food grade grease used in kitchenaids. The shop was a fobot maker’s dream — parts for everything you could imagine. The whole bill was fifty bucks — a fraction of the three hundred plus it would cost to buy a new one.
I got home and dropped the new part into place… put all the screws in — and then found a leftover piece. As usual. But once assembled, it ran like a top, and I am back in the bread business! Jeff got home from driving my grandma to the lake and was very impressed by my willingness to forge ahead without a clue, lol.
Now I shall return to degreasing the kitchen.. my tools.. my hands.. my hair…


Leave a comment